
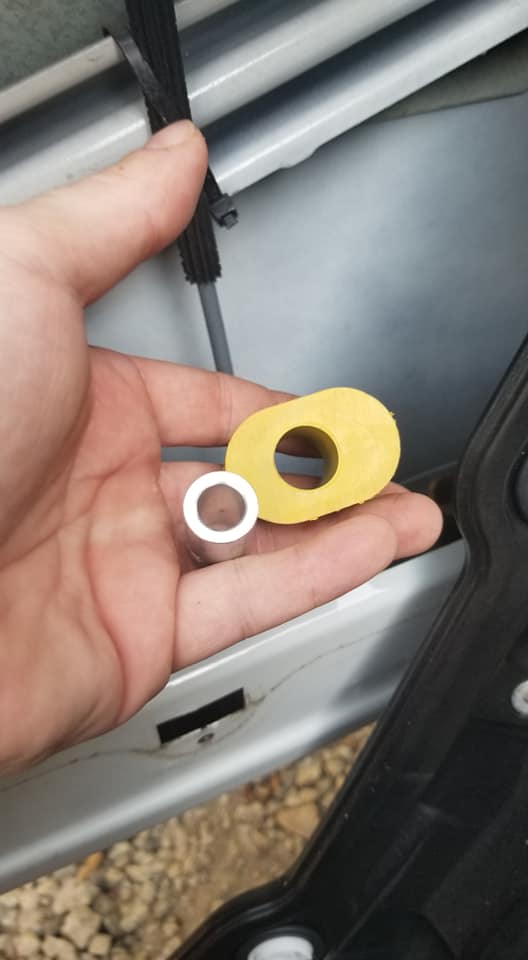
Another common issue with the e65/e66 is the rubber bushings in the door shocks go bad and fall apart. When this happens the door no longer stays put when opened. You can also feel the 1-2″ of play.
The following short video shows the play you will experience when the bushing is bad, it maybe less as you may have a little bushing left. In my case all 4 doors the bushings were completely disintegrated and nothing was left but the center bolt inserts.
[automatic_youtube_gallery type=”video” video=”qRvLs-wg8wM” player_description=”0″]
These bushings were discontinued by BMW. However the can be obtained on Aliexpress, Amazon and on Ebay. I ordered mine from Aliexpress as it was the cheapest I could find them. Coming from China to US they took a few weeks to get here. Total price was around $26 for all 4 bushings. Follow the link to store on Aliexpress I purchased mine from.
Here is a short clip from inside the door where the bushing is missing in the strut to show why there is play when its missing:
[automatic_youtube_gallery type=”video” video=”YJTl8VTs2Kc” player_description=”0″]
I did not make a video on how to remove the door panels so I am including this one by World Mechanics (http://www.mechaniclifestyle.com/ ) Stop by the video page on youtube and drop them a thumbs up for this great video.
[automatic_youtube_gallery type=”video” video=”lU1pjhDSIZI” player_description=”0″]
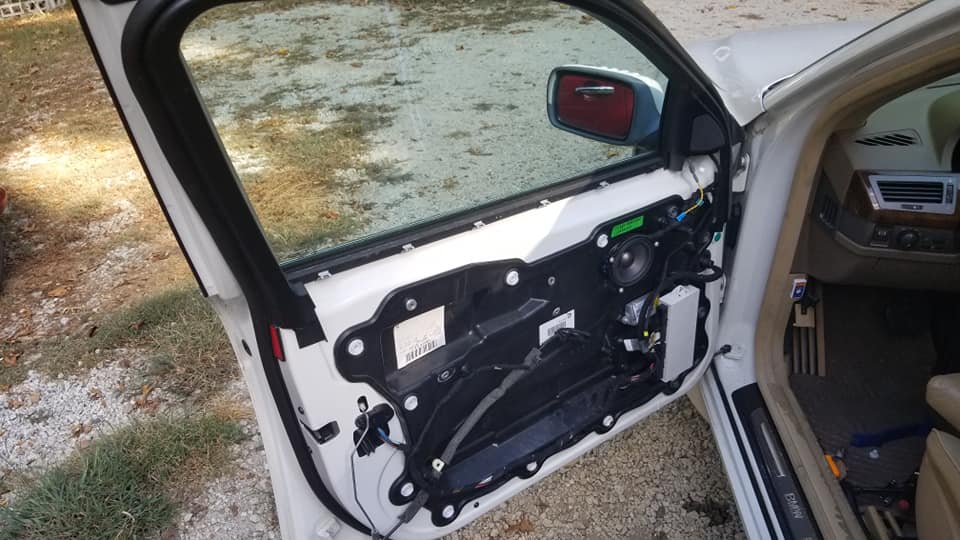
As you can see in my photo above I didn’t remove the door cable as they did I actually just pulled it out of the panel.
Next you need to remove the inner door skin. You will need unplug the door lock harness (left side of photo). Also will need to remove the cable from the door latch mechanism. Then you can use a 11mm socket to undo the plastic panel locks. It might take a little prying if you have never had this piece off as there is a gasket that can stick to the metal a little on the back.
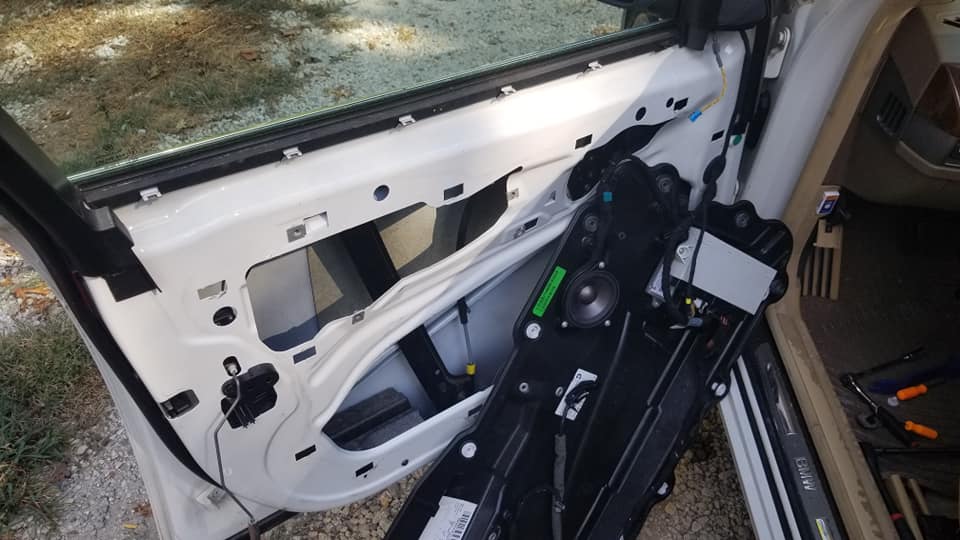
I just gently let the inner panel hang in place, this gives enough access to do what we need to do.
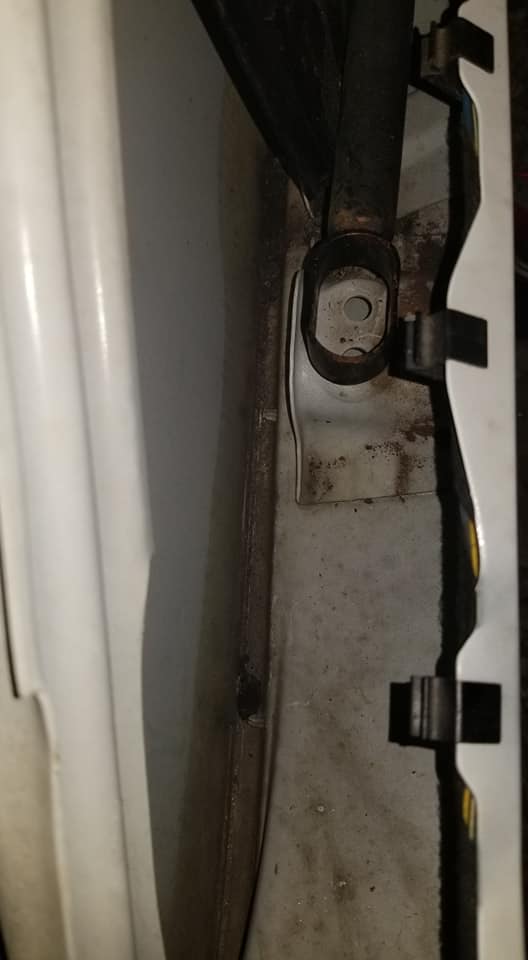
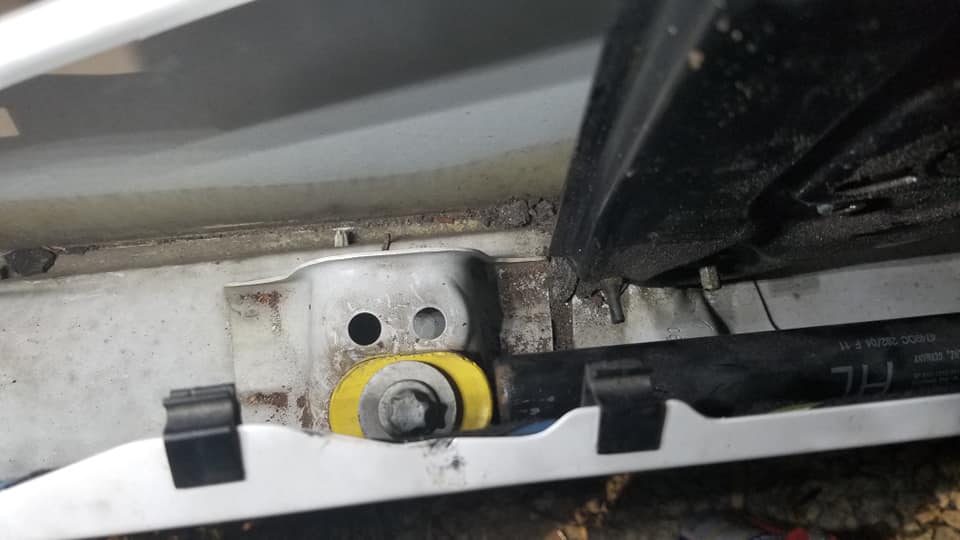
Next remove the strut bolt, I believe I used a 10mm to remove it. My mount was a little warped from years of no bushing and I actually just used a hammer and smacked it a few times to bend back into shape some. You want the long sides to be as straight as possible or you will have a hard time installing the new bushing.
My mounts were also a little rusty so I took a little sand paper to the inside to clean it up and smooth the sides. I sprayed a little WD40 onto a paper towel and wiped the inside of the mount with it clean the rust dust and help make it a little easier to push in bushing.
You could also take the time at this take to fully remove the strut and properly sand it to bare metal and paint.
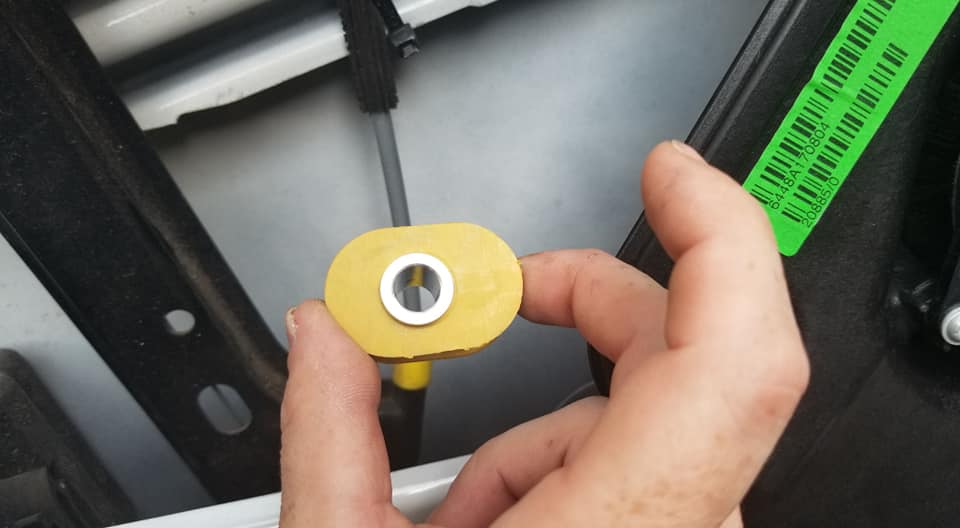
Now that our strut is prepared we can install our new bushing. This is the tricky part, it is a tight fit. If you didn’t take the time to make sure the sides were straight it will make it very difficult. To give a little more play in the bushing during install I removed the metal bolt guide. Also note that mounting hole is not dead center of the bushing, when mounting it you want the longer side of bushing facing the strut or towards to the car.
I was able to push the bushing most of the way in by hand. 2 of the 4 I used a large set of Chanel locks to help push the bushing into place.
There is a ridge on the top and bottom of bushing. This makes it difficult to push bushing into place, I tried to push it down before pushing bushing down. When it was close to bottom I rotated the strut and used a pick tool to pull this ridge outward so the bushing would seat correctly.
Once the bushing is properly seated you push the bolt guide back into place. If the hole is not round or you are having difficulty it means that mount is not in the proper shape, if it is bad whack the end with a hammer a few more times, if it is close and just difficult you can use the channel locks to help push this into place.
Now is a good time to take a shop vac and hit inside the door or pick out the bits of rubber from the old bushing. Now reinstall the door panel, dont forget to put all removed plugs and pieces back into place. Next crack a cold one and take a moment to marvel at your work and how much nicer the door moves before moving onto the next door.
[automatic_youtube_gallery type=”video” video=”MIbuDaitXsM” player_description=”0″]
Now the back doors take a little more work than the front if you have the side privacy shades. Door panel removal is basically the same as the front doors.
I am sharing another video by the same guys linked above. At 2:50 they show how to remove the rear privacy shade.
Other Than the privacy shade everything else the same as the front. Be careful removing privacy hardware as some of the plastics can get brittle and fragile over time.
That is all there is to replacing the door strut bushings. With the shape of my car I actually thought that my struts were more than likely bad and I would have to replace some. I figured I would give the bushings a go first as $26 isnt a lot of money. Well all of my struts are fine, and now all doors are smooth and hold as they as suppose too. I am very happy that I took the time to do this repair. I hope this guide helps you achieve this repair.